Synology 1-Bay DiskStation: Exchange hard disk
Owners of a 1-Bay Synology DiskStation (e.g. DS116, DS118, DS119j, etc.) often ask themselves “How to replace the hard drive without data loss?”. This article will help you, exchanging the disk of your DiskStation and migrating the data.
I myself was faced with the task that I wanted to replace the 2TB hard drive in my Synology DS118 with an SSD of the same size.
Since the DiskStation had been much too slow for me for applications like Photos or Office for a long time – especially if several family members access it – I hoped for a speed increase without having to buy a new DiskStation **Spoiler: It was worth it **.
The cost of SSD storage is historically low at the time of writing this article. So I spontaneously bought a 2TB Intenso SSD (https://amzn.to/3dZg4Ck) for a fabulous 119€.
While replacing the hard drive with the DiskStation models with 2 or more hard drive bays can run quite worry-free by simply changing the drives one after the other and waiting until the raid has synchronized again, you have to think about a strategy with the smaller models with only one hard drive slot. Unfortunately, there is no official guide from Synology on this.
The good news: It’s doable – even if you access areas of the DiskStation that you may not have seen before.
What we are doing here is cloning the entire hard drive sector by sector to a new one.
Hint: We clone the hard drive in this guide only with the help of diskstation and an external USB adapter.
If you have a Copy Station for hard drives, or a computer to which you can connect two hard drives at the same time, you can simply clone the hard drives with it (e.g. with Acronis True Image) and then install the new hard disk in the DiskStation.
Note 2: If you want your new hard drive to be a larger one, this guide alone is not enough for you. You can use them to clone the hard drive – because you have to do that first anyway – but then follow further steps that I do not describe here. After cloning, you will have exactly the same size as before on the new hard drive. After that, you would enlarge the partitions.
Another guide is in progress – you can use this guide in the meantime: https://computer-und-netzwerk.de/partition-online-mit-parted-vergroessern/
This guide works with the tool “parted” which we also use here. So first this instruction, then the next one 😉
Preconditions
- A new hard drive / SSD that is at least as big as the old one. Please find out for yourself which drives fit into your DiskStation. With my DS118, standard SATA drives with 3.5 inch or 2.5 inch fit
- A USB adapter with which the new hard disk can be connected to the DiskStation (as fast as possible – with USB 3.0), so usually a USB / SATA adapter, e.g. something like this: https://amzn.to/3flx7P6 or – if the new hard disk is also a 3.5 inch, you should take an adapter including a power supply: e.g. https://amzn.to/3LXd8T7
- Enabled SSH access to DiskStation
Using SSH you can set up a terminal session from your PC to the DistStation, i.e. a command prompt that runs on the DS, but can be operated by your computer. However, you may have to activate the access first:- To do this, go to the Control Panel of the DiskStation and activate the check mark “Activate SSH service” under “Terminal & SNMP” > “Terminal“. In the “Port” field, enter “22”.
- Then you can access the DiskStation from your computer via SSH Terminal: With Linux or Mac, you open a terminal and connect to the DistStation using the
ssh [Benutzername]@[DiskStationIP]command.
On Windows it works with the software PuTTy – here you enter the IP address of the DiskStation in the field “Host or IP Address“, then you will be asked for the user name, where you then enter the same user with whom you log in to the DiskStation. - Then enter the password with which you also log in to the DiskStation. Hint: It must be an administator user!
- Then you should see a terminal/command prompt that looks something like this:
Preparations
Backup
Create an up-to-date backup of your DiskStation, whether in the cloud or on an external drive. Safety first!
Connect via SSH and become root
Log in to DiskStation via SSH as described above. Enter the command sudo su and confirm with the ENTER key. You will be asked again for a password – this is the same with which you have already logged in via SSH.
If you don’t see another error and there is now a diamond (#) in front of the command prompt, you are officially logged in as root on your DiskStation. This means that you can access system settings, files, etc. in this SSH session. So now it’s getting dangerous! These high permissions are required, among other things, to access the entire hard disk – which we want to clone completely
Stop applications
During the data cloning process, as few changes as possible should take place on the source disk. On the one hand, this is better for the performance – but also for data integrity. This allows contiguous files to be located on different sectors of the hard disk. However, since we later copy sector by sector, perhaps only the beginning of a file and after hours only the end of a file is copied. If the file is changed in the meantime, the result is unreadable bit salad at the end.
Thus, we should limit any activity during the time copying. For this, applications such as Drive, Office, Photos, HyperBackup and everything else you have running on Synology should be stopped.
Since most Synology applications work on the PostgreSQL database, we now stop it, which already terminates most Synology services. Enter these two commands and confirm both with ENTER. The First Command may take a few minutes:
systemctl stop pgsql-adapter
systemctl stop pgsql
If both commands were executed (again the command prompt with the # at the end is displayed), you are allowed to leave the dreary terminal for a short time and log in to the DSM interface and look into the “package center”. Click on “Installed” on the left to view the installed packages; here should now have some packages in the button “execute”, which means that they are currently not executed – which should be exactly so.
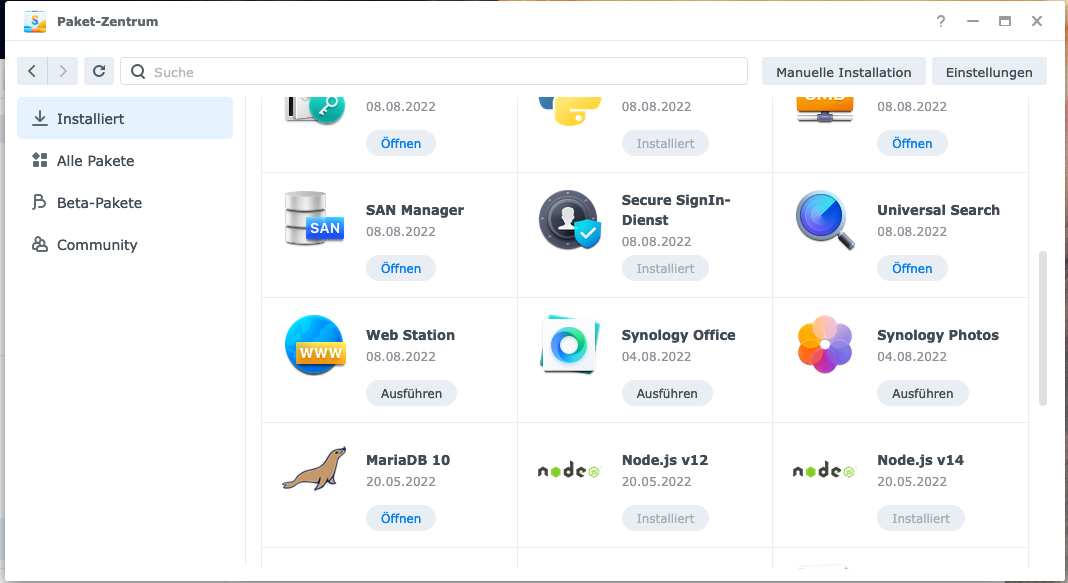
Now check if all packages that potentially change data on the hard drive are not running, these should be “Synology Drive Server”, “Synology Photos”, “Synology Office”, “Audio Station” and “Hyper Backup” among others. If you can still find services that change the data in the background, you can click on this service and click on “Stop” in the drop-down under “Running”:

This should already have limit the background activities of your DiskStation a lot.
If you have enabled sharing via SMB/NFS/AFP/NFS, you should either make sure that no computer is connected to these shares; or disable the shares in the DSM under “Control Panel” > “File Services” without further ado.
And as a tip for advanced users: If you have cronjobs set up; also deactivate them.
Connect Hard Drive
Now connect the new hard disk / SSD via USB adapter to the USB port of the DiskStation.
And back to the SSH Terminal!
We now need to find out the hardware address of the old and the new hard drive. I assume that you are still on the road via SSH and root; otherwise just look up two paragraphs above how you connect.
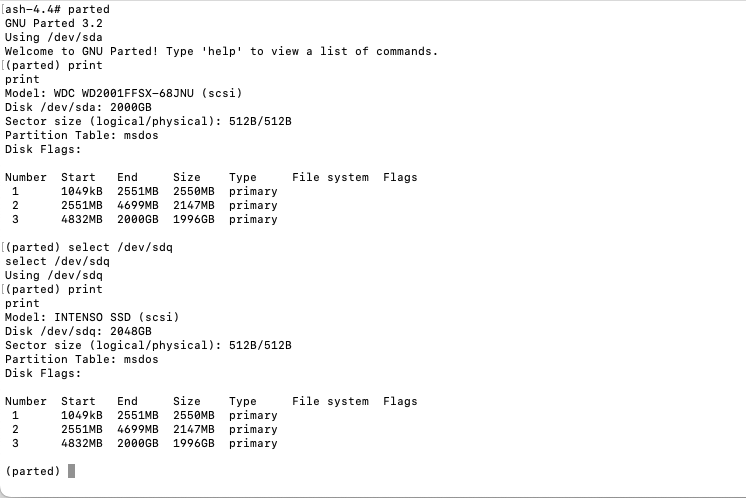
You now open the program “parted” by entering the command parted and ENTER. A new command prompt of the program appears, which always starts with (parted).
There you enter the command print devices . You’ll get a list that looks something like this:
/dev/sda (2000GB)
/dev/sdq (2048GB)
/dev/mtdblock0 (1049kB)
/dev/mtdblock1 (3080kB)
/dev/mtdblock2 (4190kB)
/dev/mtdblock3 (65.5kB)
/dev/mtdblock4 (4096B)
The top two devices are the two connected hard drives; recognizable by the size. If you can’t already tell which is the new and the old one by the size, you can display more information with the command select /dev/sd... ENTER and then print and ENTER. Here, among other things, the manufacturer is displayed.
With the command quit you end “parted” and are back in the familiar command prompt.
So the hardware addresses we need in this case are /dev/sda (the old hard drive) and /dev/sdq (the new USB-connected hard drive).
Important!! Please don’t just type in my hardware addresses in the following examples! Write down your own, and which is the new hard drive and which is the old one!! If you swap the addresses later, copy the DiskStation even without batting an eyelid the empty sectors of your new hard drive over the sectors of the old hard drive and all data is gone.
Blocksize – or: Optimize speed
The “dd” program that we later use for cloning expects a “block size” as a parameter. This is the size of the blocks that are copied as a whole. If this is well adapted to the hardware, this has a positive effect on the copy speed.
Since we like to talk about terrabytes with such a NAS, an optimization here can mean saving hours or even days.
Here is a small script with which you can easily find out the best block size:
#!/bin/bash
IF=[HARDWARE ADDRESS OLD DISK]
OF=[HARDWARE ADDRESS NEW DISK]
TEST_BLOCK_SIZES=(256 512 1024 2048 4096 8192 16384 32768 65536 131072 262144)
TIMEOUT=20s
for BS in "${TEST_BLOCK_SIZES[@]}"; do
echo 3 >/proc/sys/vm/drop_caches
timeout "$TIMEOUT" dd "if=$IF" "of=$OF" "bs=$BS" status=progress
echo BS: $BS
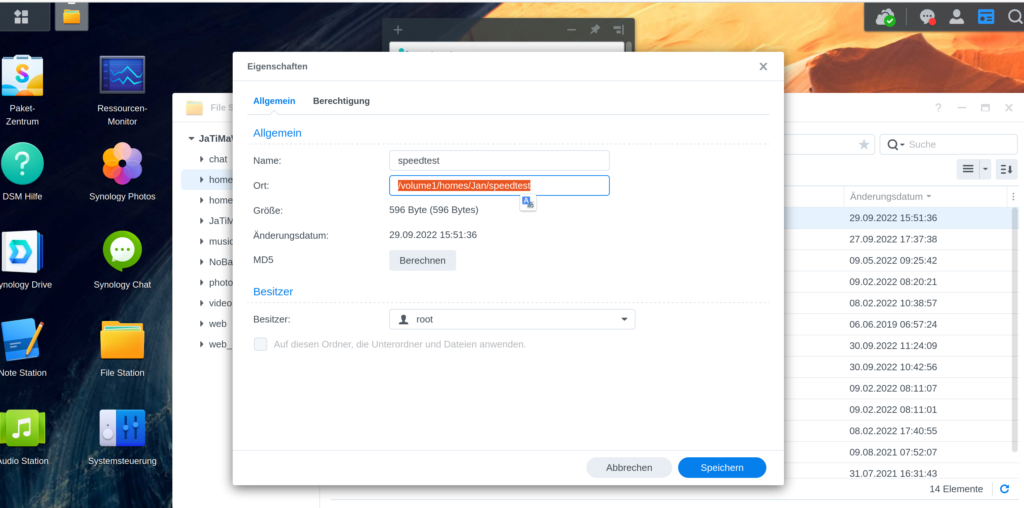
DoneYou will now save this script in a text file. After IF= and OF= you write the hardware addresses of the old hard disk (IF) and the new hard disk (OF). You then copy the text file to diskstation directly into the “home” folder (preferably via the program “File Station” in DSM).
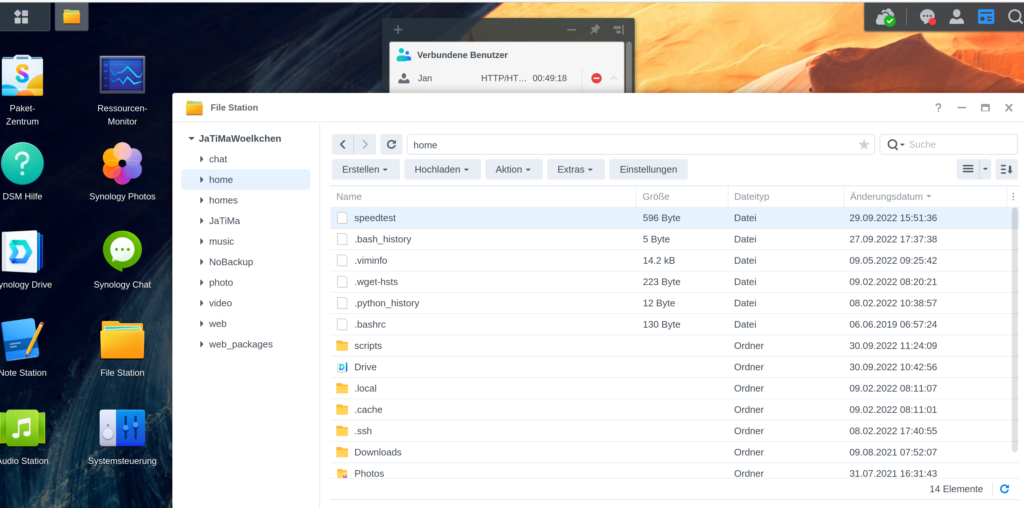
Now right-click -> properties on the uploaded file. From there, copy the value in the “Location” field to the clipboard.
The script is now on diskstation, but is not alloweds to be executed at this time. We change this with chmod +x [PATH FROM YOUR CLIPBOARD] and ENTER. If no error is displayed, it worked.
Now run the script by simply entering the location from the clipboard into the terminal and pressing ENTER.
The process now tries copying to the new hard disk for 20 seconds each for different block sizes. The result looked like this for me:
171441920 bytes (171 MB, 163 MiB) copied, 19 s, 9.0 MB/sBS: 256
173105664 bytes (173 MB, 165 MiB) copied, 19 s, 9.1 MB/sBS: 512
171348992 bytes (171 MB, 163 MiB) copied, 19 s, 9.0 MB/sBS: 1024
165210112 bytes (165 MB, 158 MiB) copied, 19 s, 8.7 MB/sBS: 2048
815616000 bytes (816 MB, 778 MiB) copied, 19 s, 42.9 MB/sBS: 4096
814653440 bytes (815 MB, 777 MiB) copied, 19 s, 42.9 MB/sBS: 8192
818790400 bytes (819 MB, 781 MiB) copied, 19 s, 43.1 MB/sBS: 16384
814481408 bytes (814 MB, 777 MiB) copied, 19 s, 42.9 MB/sBS: 32768
798294016 bytes (798 MB, 761 MiB) copied, 19 s, 42.0 MB/sBS: 65536
818937856 bytes (819 MB, 781 MiB) copied, 19 s, 43.1 MB/sBS: 131072
812122112 bytes (812 MB, 774 MiB) copied, 19 s, 42.7 MB/sBS: 262144
What we are looking for is the line in which the most was copied in the 20 seconds and from this line we need the block size that will output at the end.
For me, these are the block sizes “16384” (=16Kilobytes) and “131072” (=128Kilobytes). I choosed the value “131072“.
You can now copy the fastest value to your clipboard!
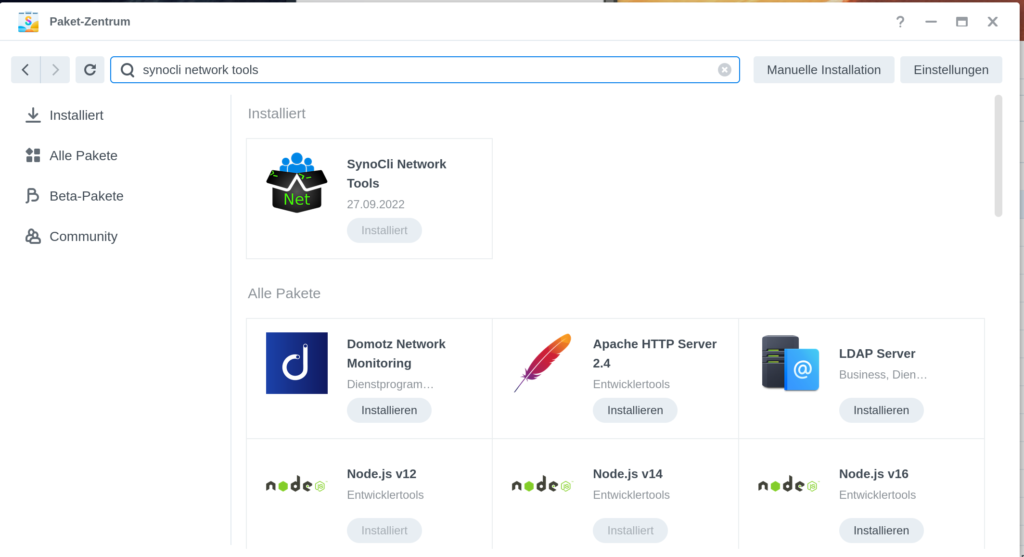
Install SynoCli Network Tools
Last but not least and before it can finally start, we now need the program “screen”, which is in the package “SynoCli Network Tools“.
First of all – what is “screen”. This is a program that can detach a terminal session from the SSH session.
Huh?! – The problem is that the copying process will take quite a long time and will take place in your SSH session. This session is terminated as soon as your computer loses the SSH connection to the DiskStation, e.g. the computer goes into the StandBy, loses the WLAN connection or you just want to turn off the part.
In this case, your copy operation would stop immediately – Annoying if you arrive at 1.8TB of 2.0TB after 10 hours of waiting…
This is what the “screen” program will prevent – it detaches an SSH session from the current session.
The SynoCli Network Tools package is provided by synoCommunity and not Synology itself. To install SynoCommunity packages with the Package Center, proceed as described here: https://synocommunity.com/#easy-install
Then you can install “SynoCLI Network Tools” as normal via the Package Center.
Finally copy the data!
After we have made all the preparations, we can finally start – we copy the data to the new hard drive.
The procedure may take different lengths of time depending on the size of the old hard drive and the speed of the two hard drives and the USB adapter.
For me, 2.0 terabytes with a USB 3.0 adapter from a WesternDigital hard drive to an Intenso SSD took almost exactly 14 hours.
It should be noted here: Since we copy sector by sector, the size of the old hard disk matters – not how much of it is really used!
Starting the procedure is now simply done with the following command:
screen dd if=[HARDWARE ADDRESS OLD DISK] of=[HARDWARE ADDRESS NEW DISK] bs=[BLOCKSIZE] status=progress
With ENTER it starts, and now it takes time. It is best to leave the Diskstation alone during this time; all services are stopped anyway!
The program “dd” now always shows you how much has already been copied (there is no percentage display or even a remaining time display; dd does not know how much data it has to copy, it copies until nothing more comes).
If your SSH session is terminated in the meantime, you will return to the SSH terminal after logging in again and then become root (# before the command prompt) with the command screen -r back to the status display.
If the message “No screen to be resumed” appears, dd is either finished or aborted (hopefully the former).

Hours later
When dd is finished, it just ends quite unspectacularly.
Before you remove the old hard disk and exchange it for the new one, you can test with the program “parted” whether the contents of the hard disks are now identical:
- Start Parted with the command
partedand ENTER select [HARDWARE ADRESSE ALTE PLATTE]-> ENTERprint-> ENTERselect [HARDWARE ADRESSE NEUE PLATTE]-> ENTERprint-> ENTER
The output should output two tables with equal partitions:
If so, you can shut down your DiskStation and replace the hard drives.
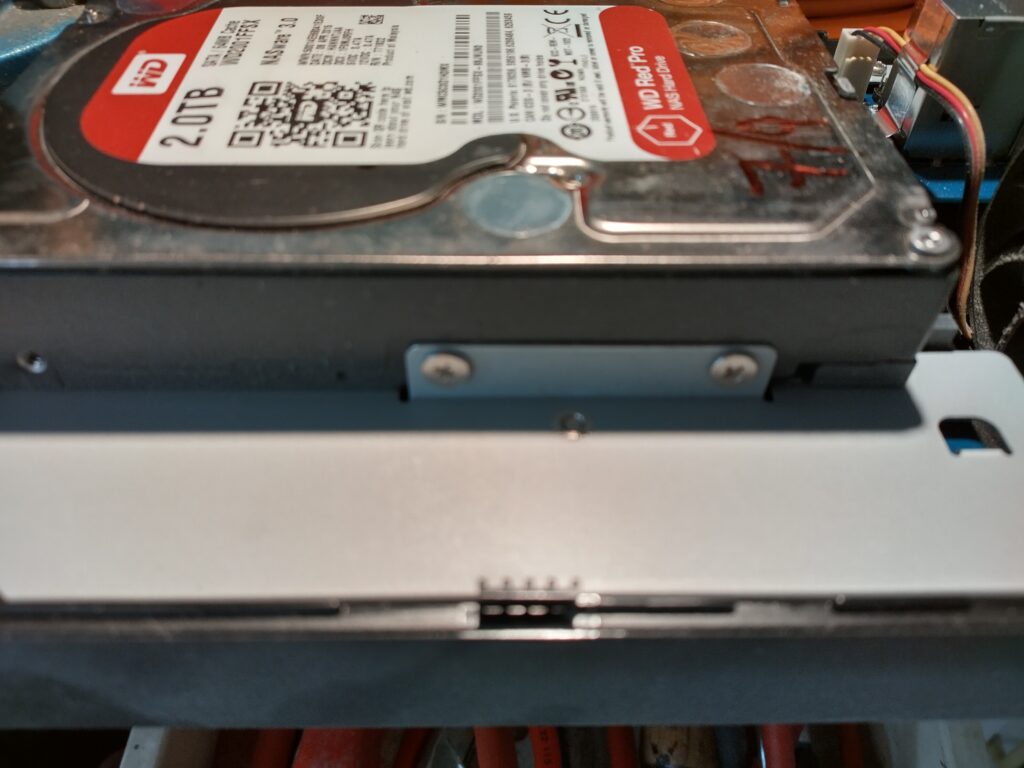
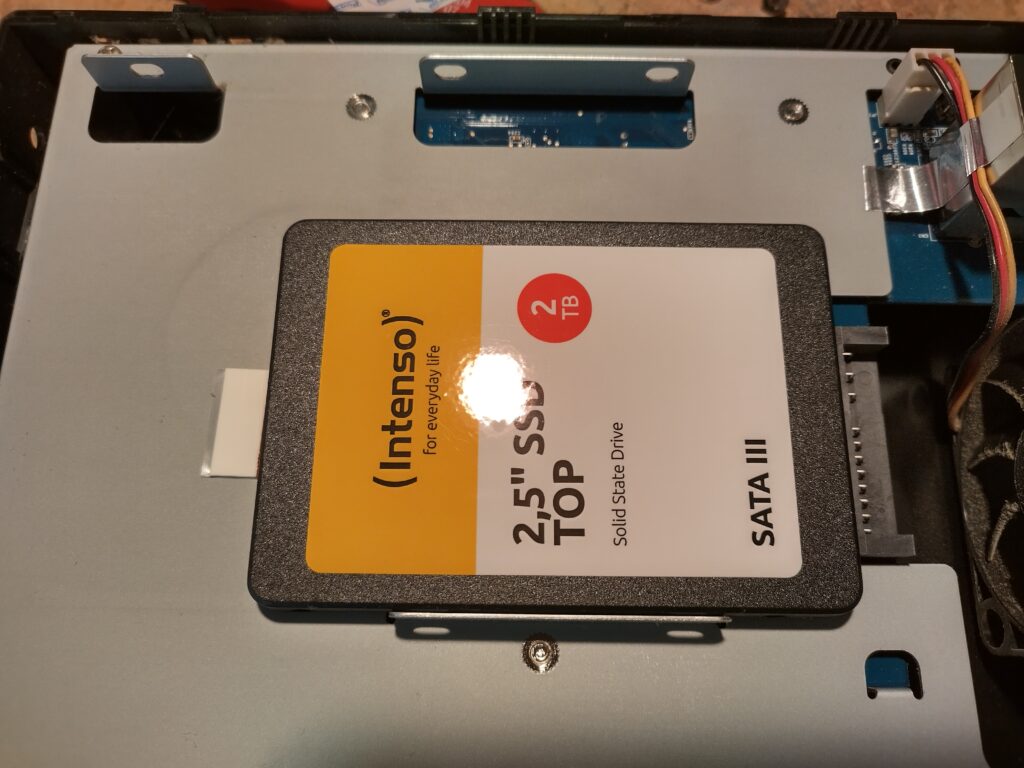
Replacing the Hard Drive
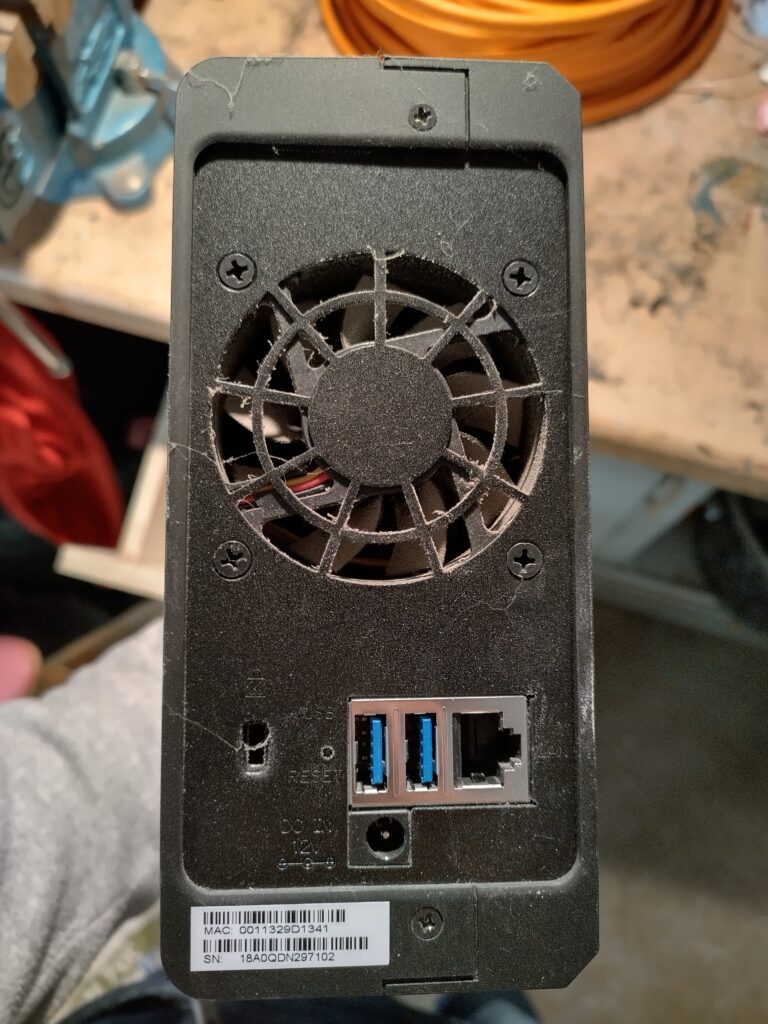
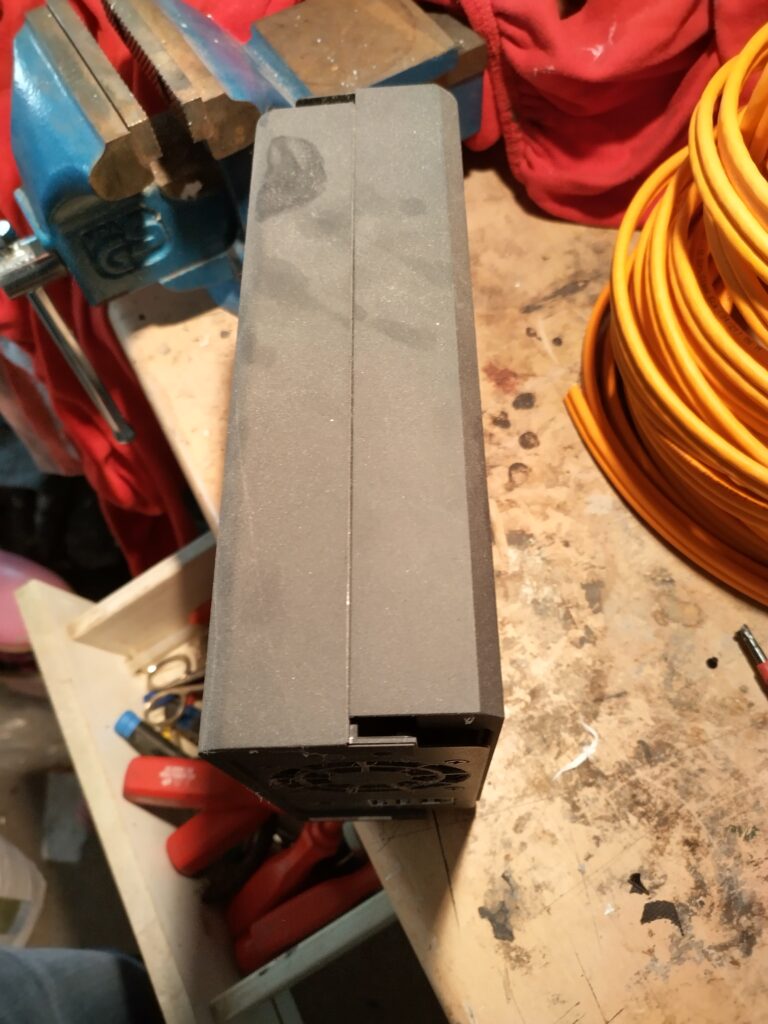
To replace the hard drive, in my case (DS118) I only had to unscrew two screws at the back and was able to push the two halves of the case apart.
Then loosen the hard drive with the 5 screws on the sides and pull away from the connectors.
The new SSD has only 2.5 inches instead of 3.5 inches and therefore no longer reaches the rails for attachment. There are adapter rails, but since the SSD is so light, I simply fixed it with a Tesa Powerstrip.
Then reassemble the DiskStation in reverse order and reconnect and boot up.

Back?
After the hard drives have been replaced and the DiskStation has been reconnected and turned on, hopefully it should be booted up again.
Log in to the DSM and go to the Parcel Center. Now try to start one of the stopped services by clicking on the “Run” button on the “Synology Drive Server” button, for example. If an error message alà This package requires that “pgsql-adapter.service” is activated, you must log in to the SSH session again and become root and execute the following commands:
systemctl start pgsql
systemctl start pgsql-adapter
Hopefully this will go through without mistakes; if not (I had not stopped the two pgsql services in my attempt but stopped the individual services in the package manager; an error because the database was corrupted in the end) look into the log file of pgsql using the command tail /var/log/postgresql.log and ENTER.
Is there now an error message “pgsql invalid primary checkpoint record” to be found; helps you the following sequence of commands:
user "postgres"-> ENTER This allows you to slip into the role of the postgres userpg_resetwal /volume1/@database/pgsql-> ENTER this checks if there is really an invalid checkpoint recordpg_resetwal /volume1/@database/pgsql -f-> ENTER repairs this record
Then we try again with
systemctl start pgsql
systemctl start pgsql-adapter
And hopefully we can now restart all stopped applications in the package center.
Conclusion
With this method you can copy the data to a new hard disk with little to no additional costs (maybe you already have a USB adapter) to the actual hard disk.
The DS118 has a fairly fast USB 3.0 port and with the right adapter, the process took about 14 hours with 2TB large hard drives – I had expected more!
You have to be a little careful what you do but with concentration the process can be done well.
The DiskStation has become much faster due to the installation of the SSD; it is not a rocket but compared to the old hard drive, office documents now open within 1-2 seconds and scrolling through the photo timeline goes almost without delay.
If you have any questions or suggestions (this is my first guide to that extent!), please read the comments below 🙂
One thought on “Synology 1-Bay DiskStation: Exchange hard disk”